How to Respond to IDX Privacy and Identity Alerts
At IDX we want to make sure you get the most of your identity and privacy protection. One of the most powerful features of the protection plans is the automatic alerts that warn you when monitoring finds possible misuse of your personal information or social media accounts. These timely warnings enable you to take action to stop misuse and protect yourself, so let’s talk about how to read and respond to alerts.
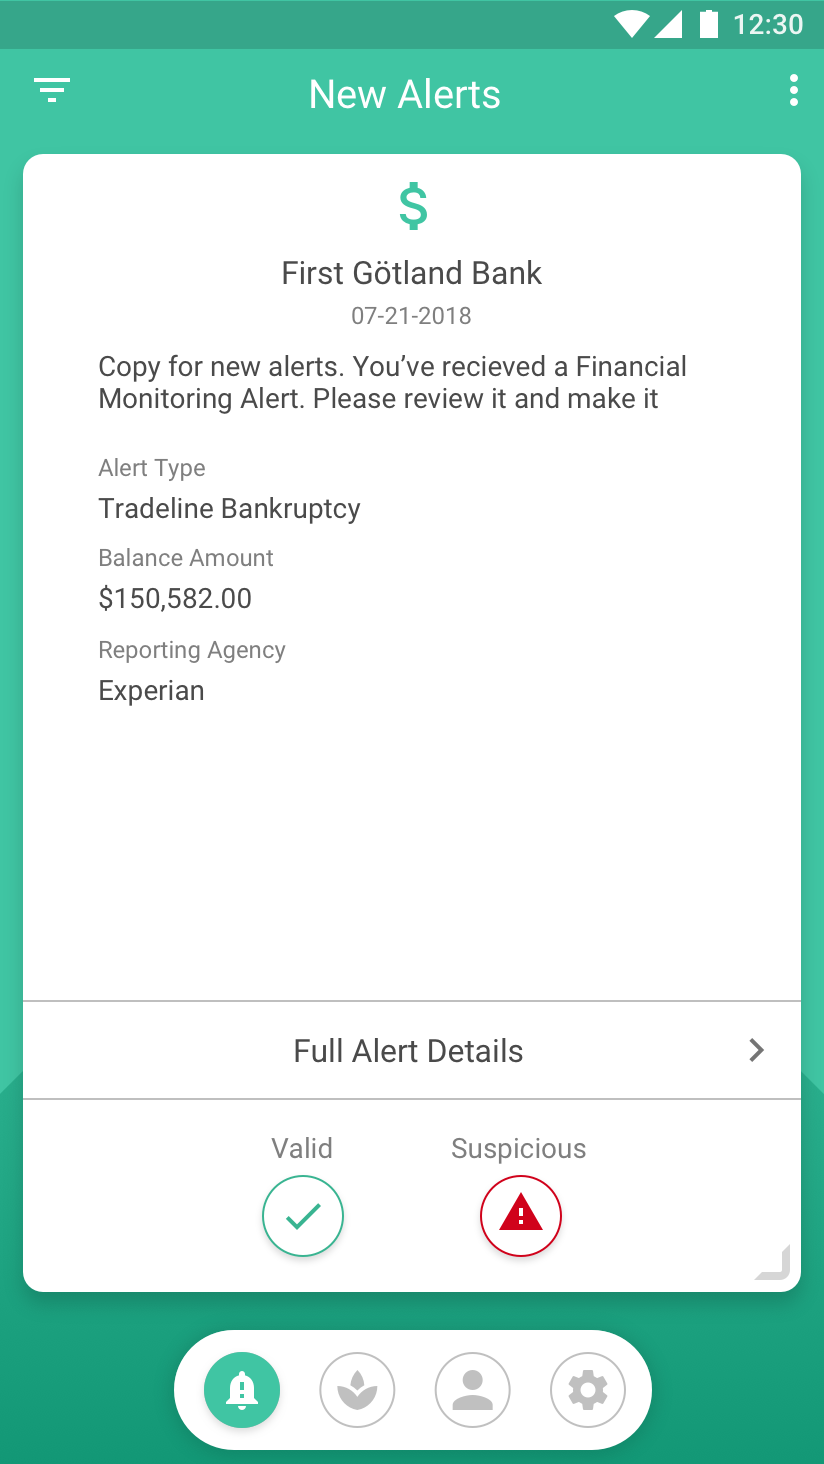
When you are enrolled in an IDX Privacy and/or IDX Identity protection plan, sooner or later, you will see an alert (as shown below) either in your email or through the IDX mobile app.
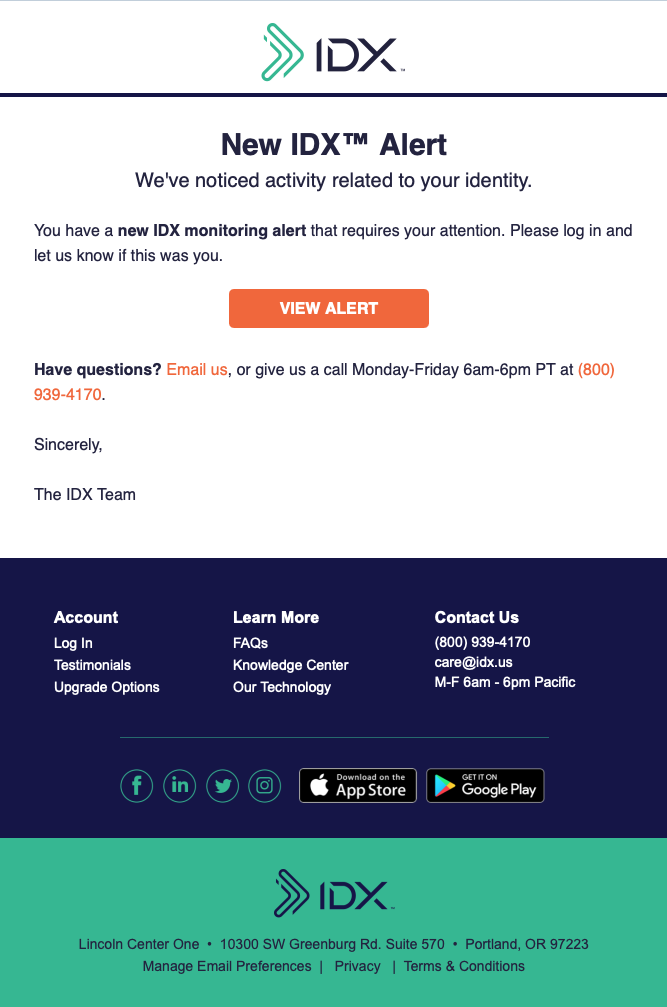
Alerts are proof that your protection plan is working, and an alert usually doesn’t signal an emergency, just a possible risk that can be easily handled. As you get in the habit of reviewing them, they will soon become as routine as activity alerts on your financial accounts. In fact, IDX alerts are better because they not only tell you what’s happening, they also explain what you can do about it.
Read on to find out:
- What the alert is telling you,
- How to manage your alerts and alert settings,
- And how the recommended actions can help keep your personal information secure
What is an Alert?
An alert is a notice that the IDX platform has detected: a sudden change related to your personal identity. One important thing to note: an alert doesn’t necessarily mean that your identity has been stolen. For example, your credit score can change for any number of routine reasons. And sometimes changes in accounts happen due to delays in data entry or clerical errors. So, an alert may require follow-up to determine the cause, but often the causes will be routine or easily corrected.
Depending on your IDX membership, you could receive numerous kinds of alerts:
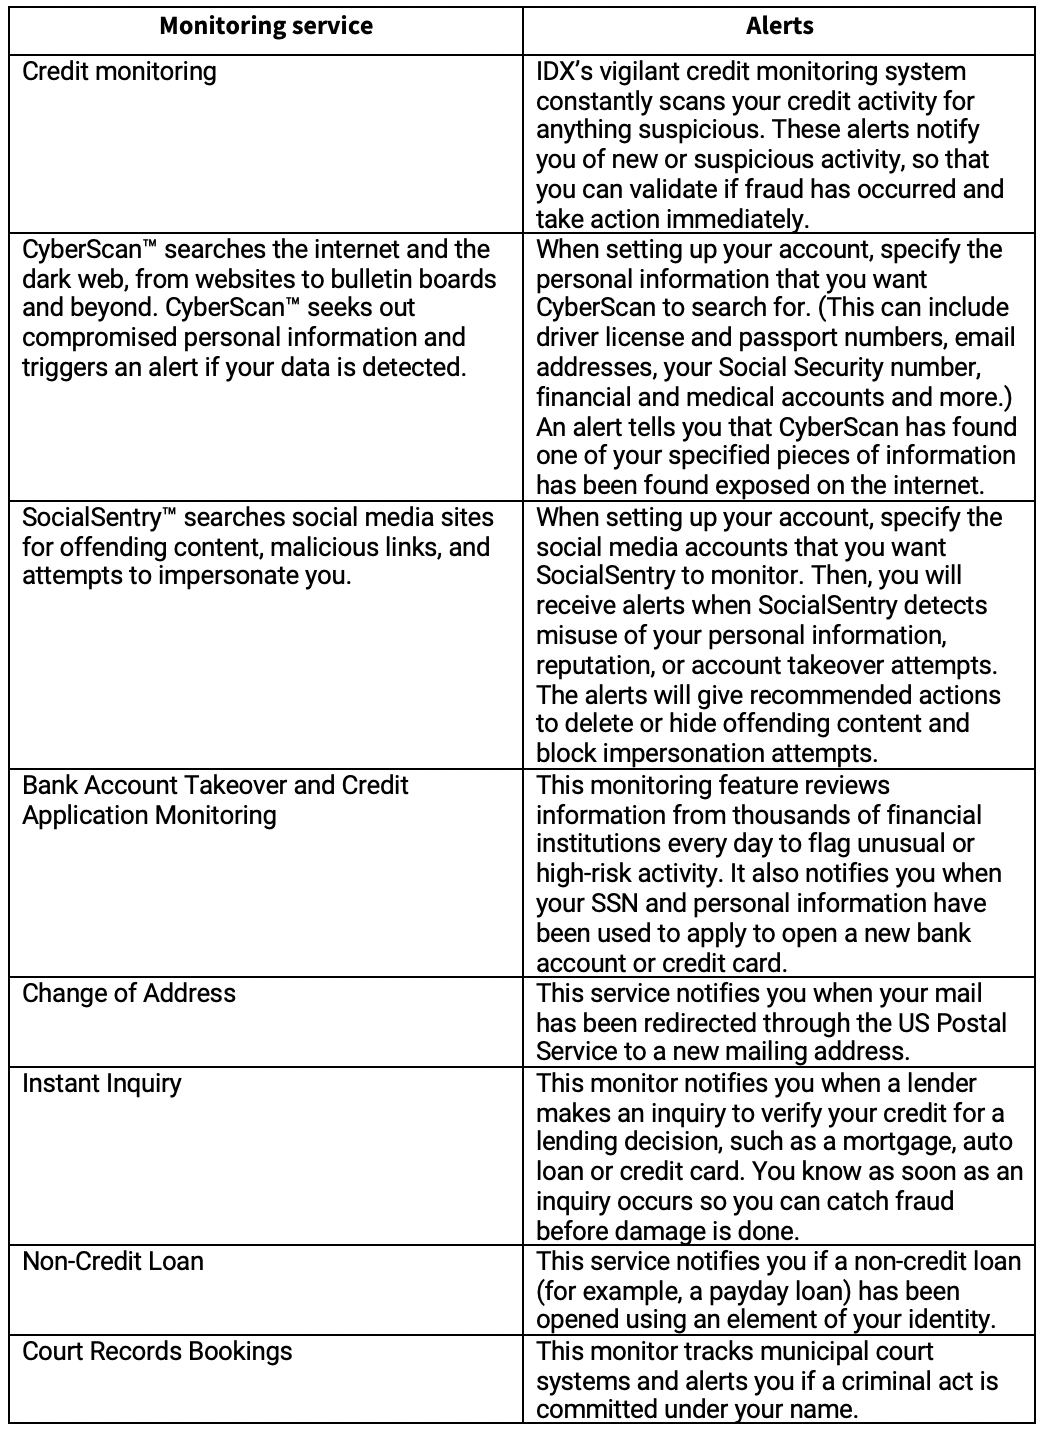
How to View Alerts in a Web Browser
When you receive notice of an alert via email, click on the “View Alert” button to open a web browser and log in to your IDX account.
After you log in, you will see your dashboard. (You can always return to the dashboard by clicking on the icon with four little squares at the left side of the browser window.) You can review alerts in the Notifications inbox at the top of the dashboard.

Month in Review and other routine communications will have a green background on the left side of the notification banner, whereas alerts will be on a white background. To read an alert, click on the down arrow at the right side of the banner. The alert box will expand, showing the details of the alert. To hide the explanation again, click on the same arrow. (It changes to an up arrow when the alert details are showing.) Note: if you click to expand an alert that’s showing at the bottom of the list, you may have to scroll down to see the details.
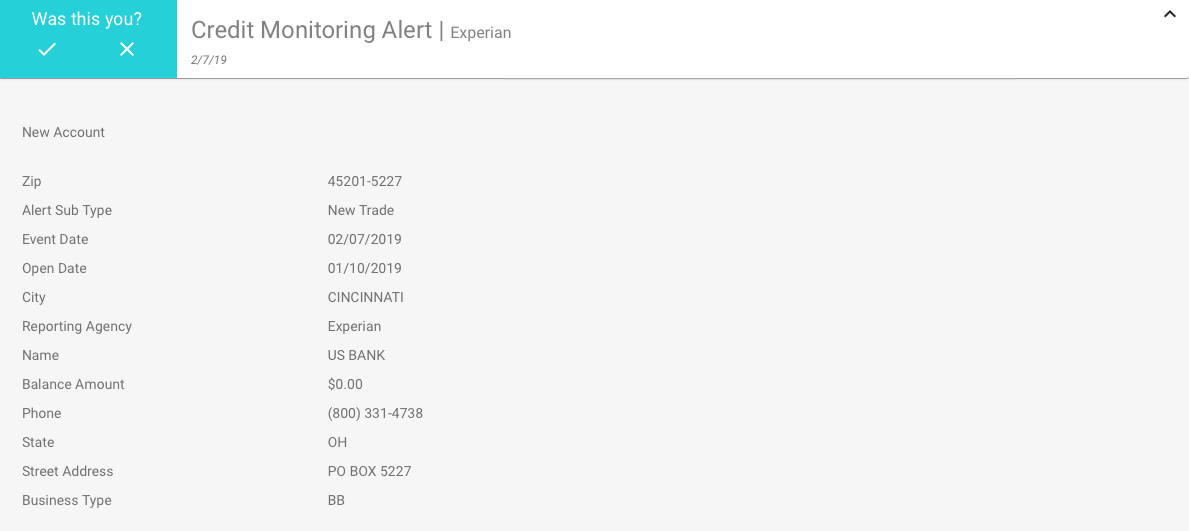
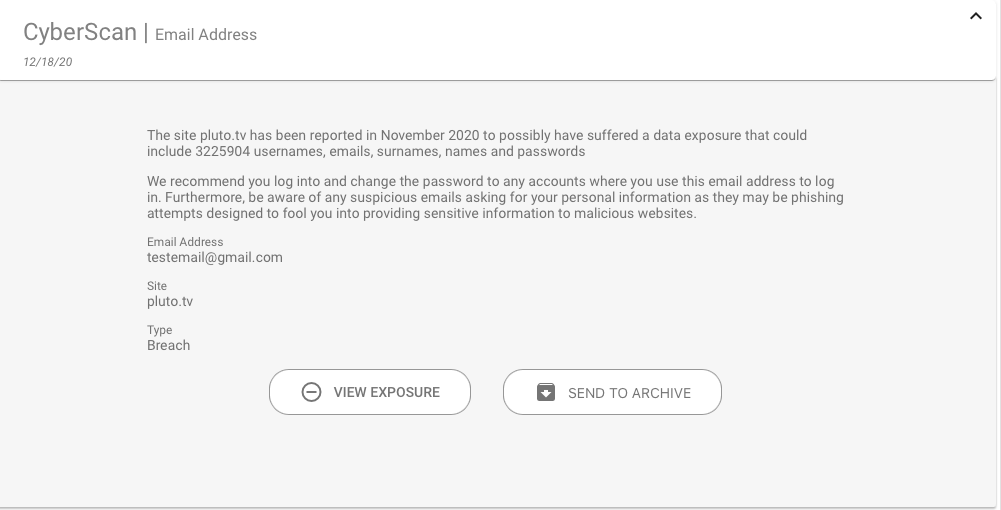
Some kinds of alerts will include recommended actions, such as changing the password for an account that was exposed in a data breach. Others will give you the opportunity to mark the alert as valid, for example, if you receive a new account alert on your credit report and you did open that new account, you can mouse over the banner and click on “Yes, this was me” to confirm that the activity was yours. The alert will pop up a button asking you to confirm your selection, and that will send the alert to the archive (described in the next section).

Some alerts will also display buttons you can click to take action or view more details.
Alerts can also show up in other sections of the dashboard. For example, in the CyberScan™ box, there will be a red alert icon if your personal information has been exposed. Those symbols are just for your information. You will still resolve and manage those alerts under the Notifications inbox.

How to Archive Alerts
Once you’ve resolved an alert, you can move it to your archive. When you display alert details in your Notifications inbox, you will see a “Send to Archive” button at the bottom. You can click this button to send the alert to your archive. Note: Alerts will automatically be archived when you confirm them as valid.
You can still view, change, or respond to alerts in your archive or move them back to your Notifications inbox. To view your archive, click on the clock in a circle icon at the upper right of the Notifications inbox.

To go back to your inbox, click on the triangle icon to the left of the archive icon. You can tell whether you’re viewing the inbox or the archive by which icon is in color. For example, when you’re in the archive, the archive icon will be green and the inbox icon will be gray.
When you’re viewing the archive, you can take all the same actions with alerts as you can in the Notifications inbox. The only difference is that, instead of a Send to Archive link in the alert details, there will be a Return to Inbox link. You might return an alert to your inbox, for example, if you thought if it was resolved but then discovered it is suspicious and want to be reminded to follow up on it.
Managing Alert Settings
If you don’t want to receive alerts from one of your services temporarily, you can turn alerts on and off by moving the slider next to that service name in the Services list below the Notifications inbox.


How to View and Manage Alerts on the IDX App
On the IDX app on your mobile device, you will see the alerts inbox as the first option on your home screen. Tap on the arrow at right to see your alerts, then swipe right or left to browse through the alerts. At the top of this view, you will see tabs you can tap to toggle between new alerts and the alerts archive. (You can also tap the bell icon at the bottom of the screen to jump to your alerts from anywhere in the app.)
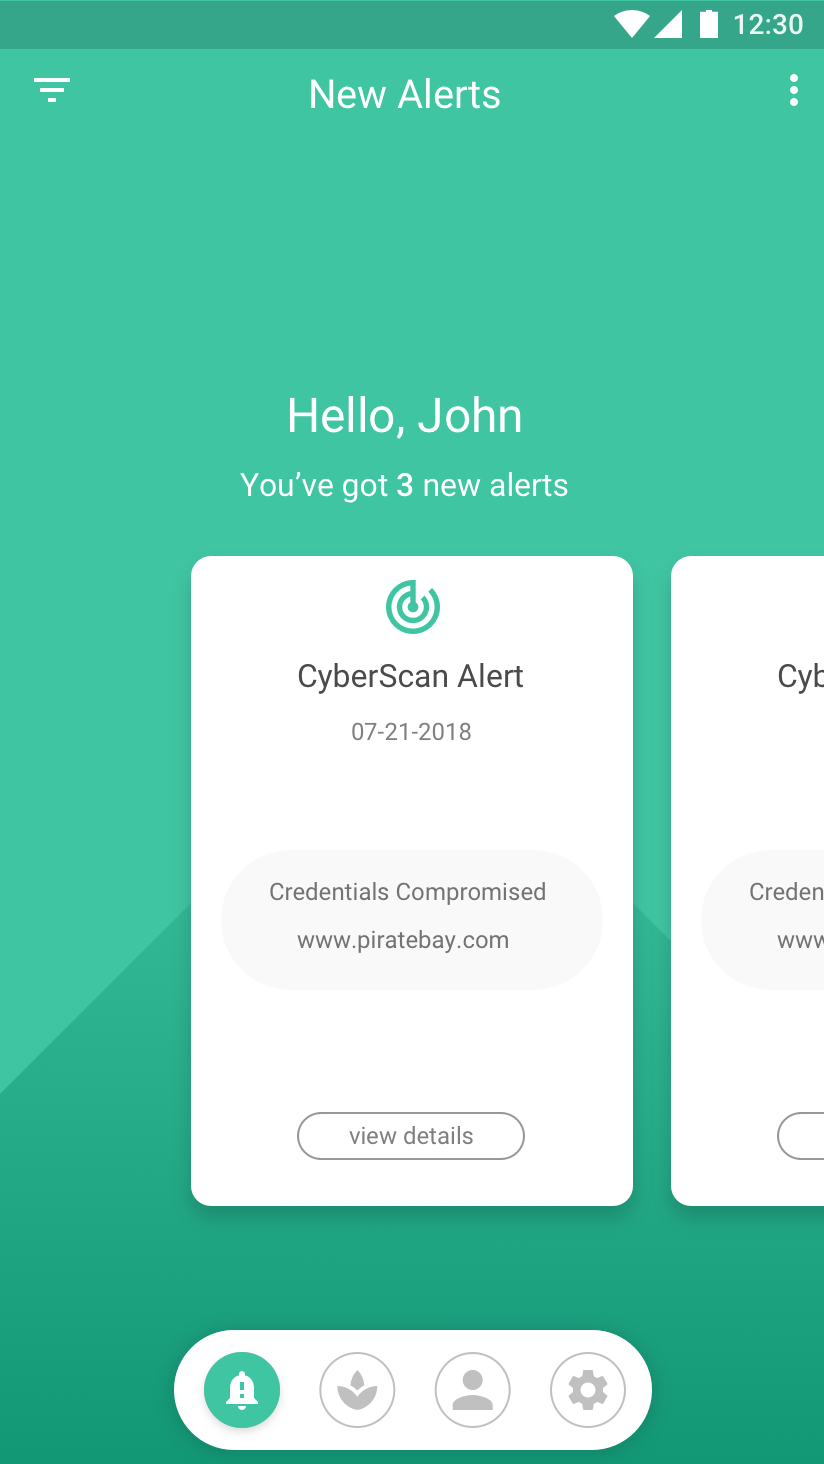
To see details, tap the “view details” button at the bottom of an alert. If there are more details than fit on the screen, you’ll see an arrow to display full alert details. To send an alert to the archive, tap the “Archive” button at the bottom of the alert details view. To close the details and return to the alerts inbox, tap the back arrow (<) at the upper right of the screen.
In the Archive view, alerts are displayed as a list. Tap the down arrow at the right of an alert bar to expand and see details. To move an alert out of the archive and back to the new alerts inbox, tap the “Unarchive” button at the bottom of the details view. To collapse the details view, tap the up arrow at the top of the details page.
Following Recommended Actions
Each alert includes recommended actions for how to respond or resolve the situation. In some cases, you will review a transaction on an account or a change on a credit report to confirm whether the activity is valid or whether it’s suspicious. In other cases, the alert will recommend that you change a password or give you instruction on how to contact a vendor to challenge a transaction. In the case of any inappropriate social media content or account takeovers, there will be instructions on how to have bad accounts or content taken down. The alert details contain enough detail for you to resolve the situation or to determine that there has been identity fraud, or your privacy has been violated. That’s when the IDX recovery team swings into action!
When to Call IDX for Help
If you receive an alert that is suspicious or you’ve taken the suggested action and discovered identity theft (such as a bank account takeover) or can’t resolve the issue (such as possible fraud using your medical coverage), it’s time to call the IDX Care team for help. The toll-free phone number to call is included in every alert email and in the alert details that you view in your web dashboard or the app.
You can also send a request for help directly from your alert inbox. Mouse over the alert banner, and when the Is This Accurate tab pops up, instead of clicking the check mark, click the X. This will pop up a button saying “Confirm As Suspicious”.

Click this button to send a request, and a recovery expert will contact you to help resolve whether there is fraud and, if so, to put your identity and privacy on the road to recovery.
About IDX
We're your proven partner in digital privacy protection with our evolving suite of privacy and identity products.


