How to Enroll in Your Data Breach Protection Plan
If your personal information has been exposed in a data breach, the best news you can get is a letter providing you with free enrollment in IDX’s identity theft protection plan. As soon as you sign up, you’re no longer facing identity and privacy threats alone. Instead, you’ll be joining the 40 million Americans who already enjoy IDX’s best-in-class protection. It’s time to enroll and set up your account.
Note: If you’ve already enrolled in your data breach protection plan but need help adding your information, skip ahead to Setting Up Your Credit Monitoring and CyberScan.
1. Go to the website mentioned in the data breach notification letter you received in the mail.
- If you are directed to https://app.idx.us/account-creation/protect, proceed to step 2.
- If you are directed to an informational page explaining the benefits of your data breach protection plan, click the “ENROLL NOW!” link to begin your enrollment. (No need to visit www.idx.us to enroll.)
2. On the next screen, enter your email address, select a password, and re-enter the password to confirm it.
Passwords must be at least 8 characters long and contain at least one capital letter, one lowercase letter, one number, and one special character other than a space or period. Once you’ve entered your password, click the “CREATE” button.
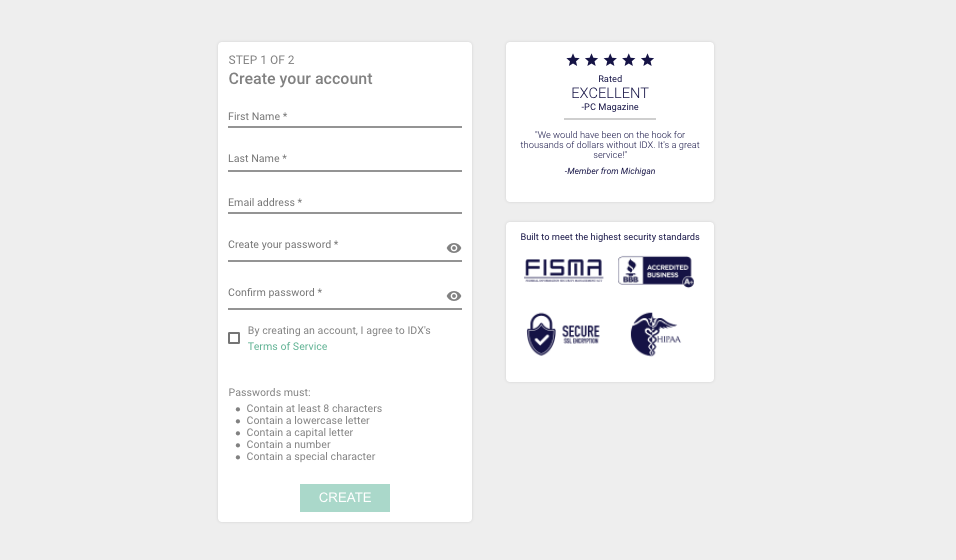
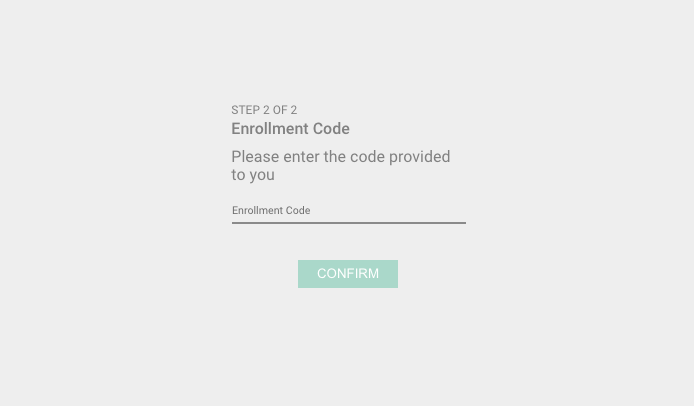
3. On the next screen, enter the enrollment code provided in the data breach notification letter, then click the “CONFIRM” button.
Please note: Some notification letters may not have an enrollment code. In that case, refer to the letter for details.
4. You should now see a message stating that your account needs to be verified from the email address you supplied in step 2.
This step protects the security of your IDX account. Go to your email inbox and look for the IDX verification email. Open the email and click the “VERIFY EMAIL” button to confirm your email address is correct. This will take you to the IDX login screen, where you can now log in with your email address and the password you chose in step 2.
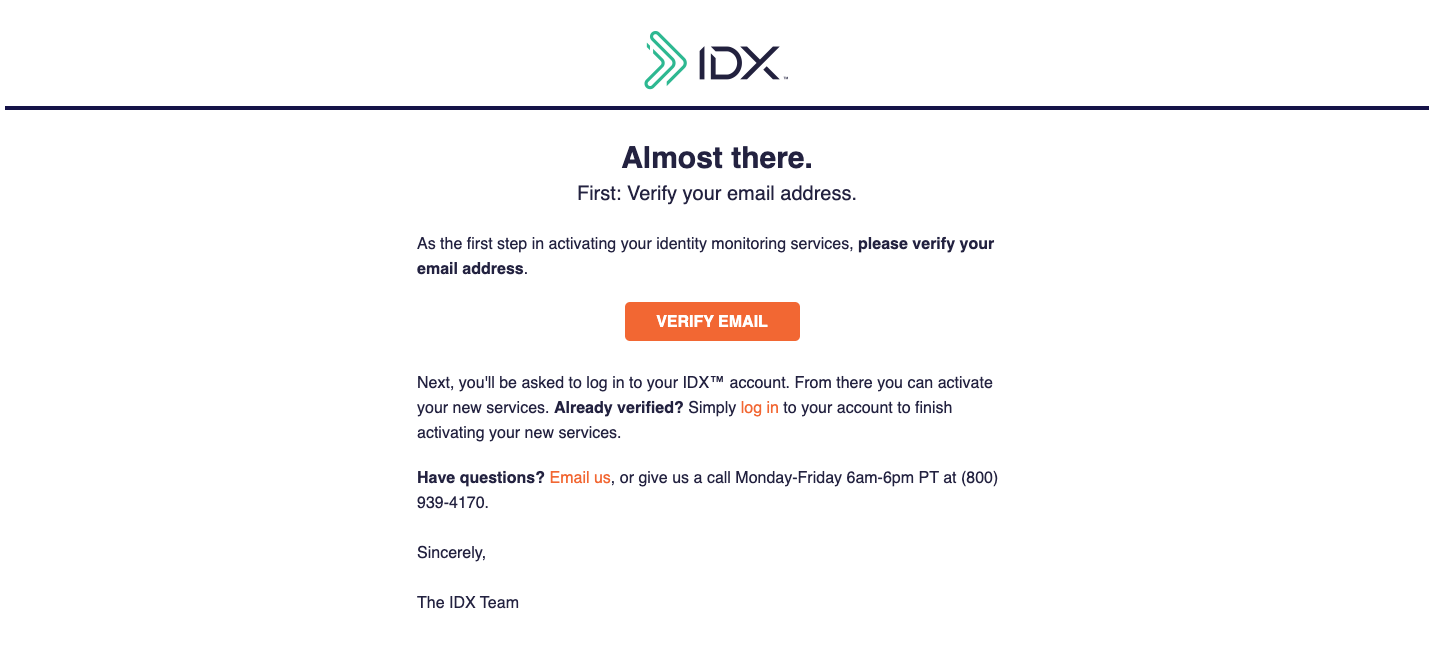
Congratulations, you’re enrolled!
Once you’re logged in, you’ll see the welcome screen. Click the “START THE TOUR” button to explore IDX or click “Skip the Tour” and go directly to your IDX dashboard. Now it’s time for the most important step: adding your personal information so IDX can begin monitoring and protecting.
Setting Up CyberScan and Credit Monitoring
Once you’ve completed enrollment, it’s time to activate two key features: CyberScan—a tool that continually searches the deep and dark web to see if your information has been potentially exposed to cybercriminals—and 24/7 credit monitoring. Both are easy to set up:
1. After you complete the IDX tour, a popup window will appear for CyberScan. Click the “ADD NEW DATA” button.
You can add personal, financial, and/or medical data so that CyberScan can begin monitoring it for exposure on the deep and dark web. When you’ve finished adding your information, click the top icon on the left sidebar (the one that looks like four tiles) to return to your dashboard.
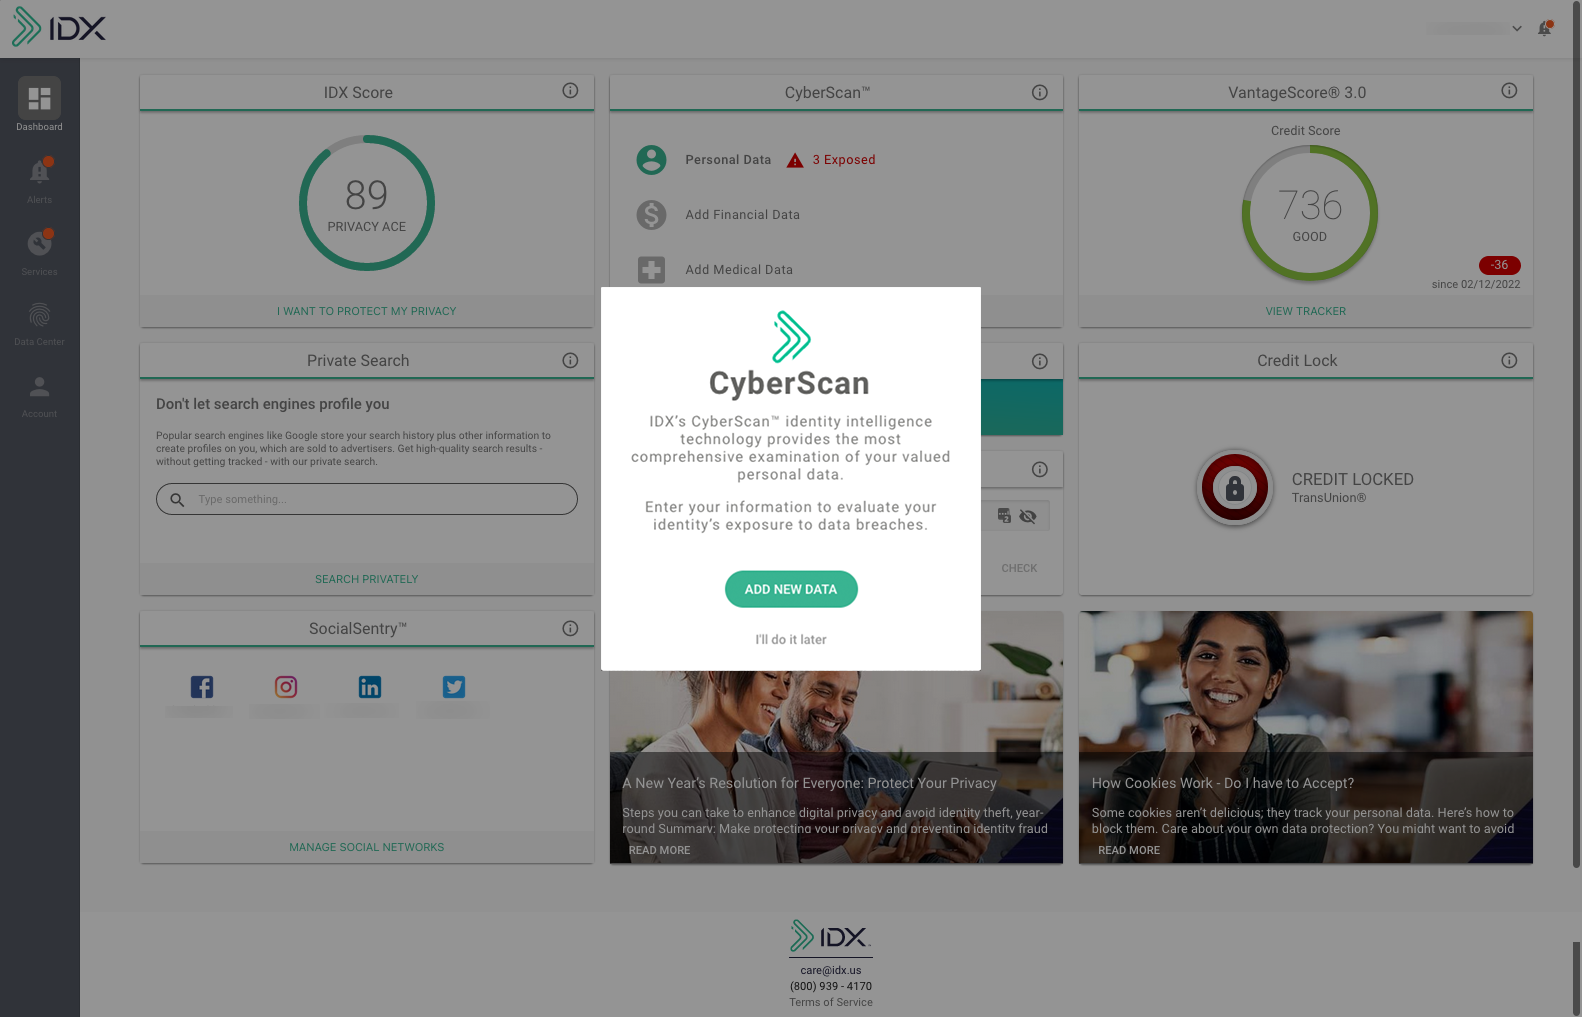
2. To set up Credit Monitoring, go to the IDX Services page and click the “Credit and Identity Management” tab at the top of the page.
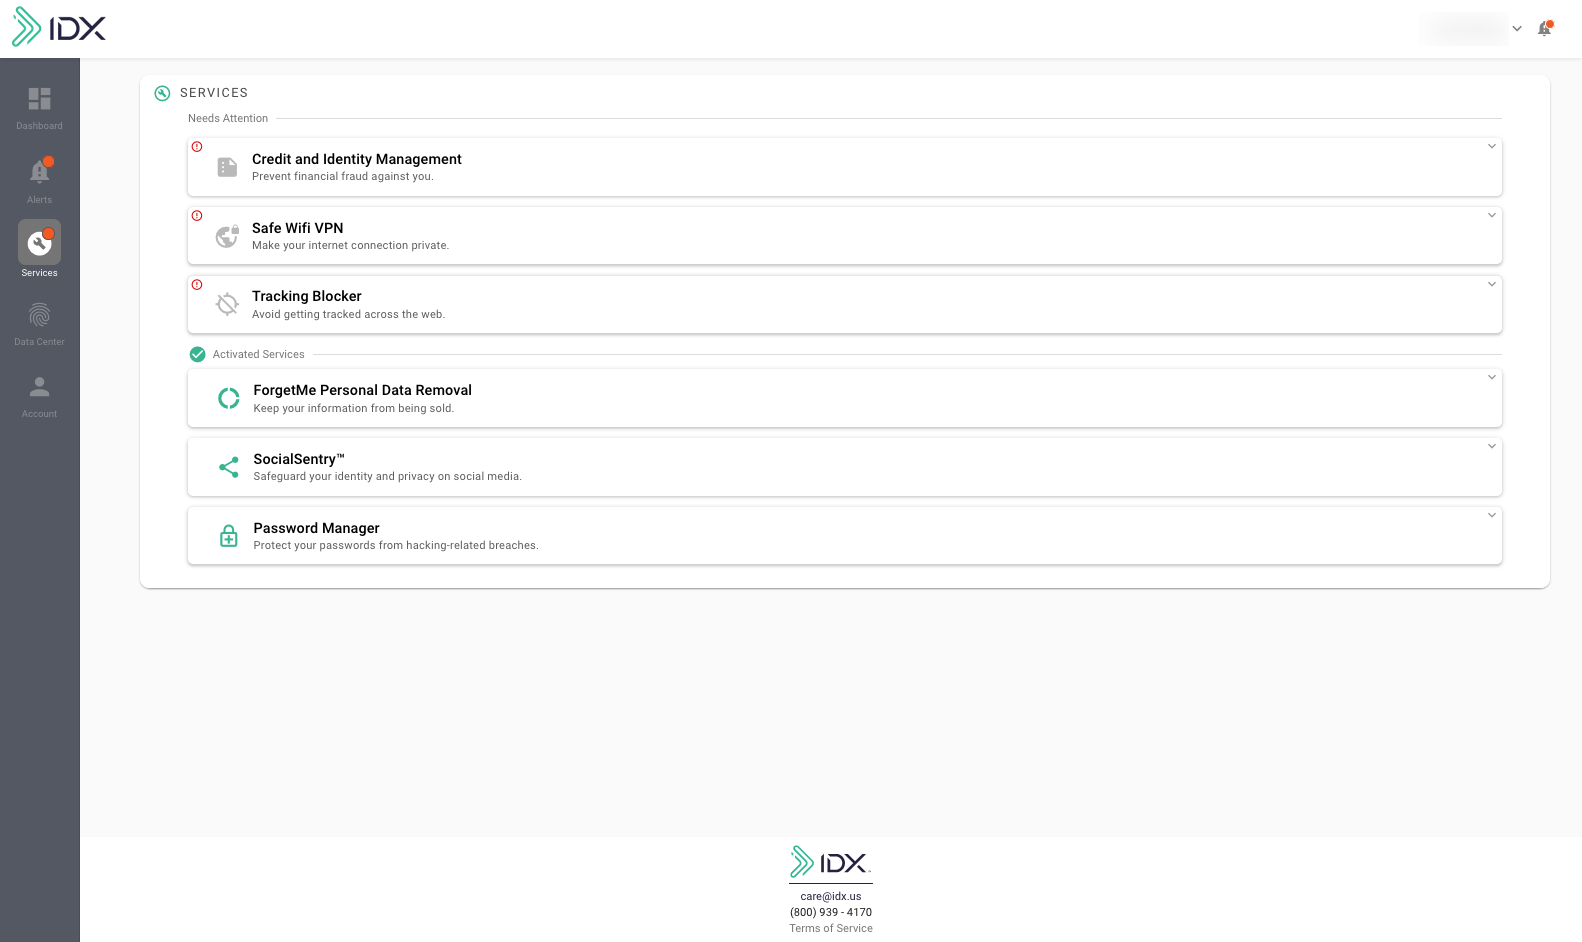
3. You will be prompted for your personal information so IDX can start your credit monitoring.
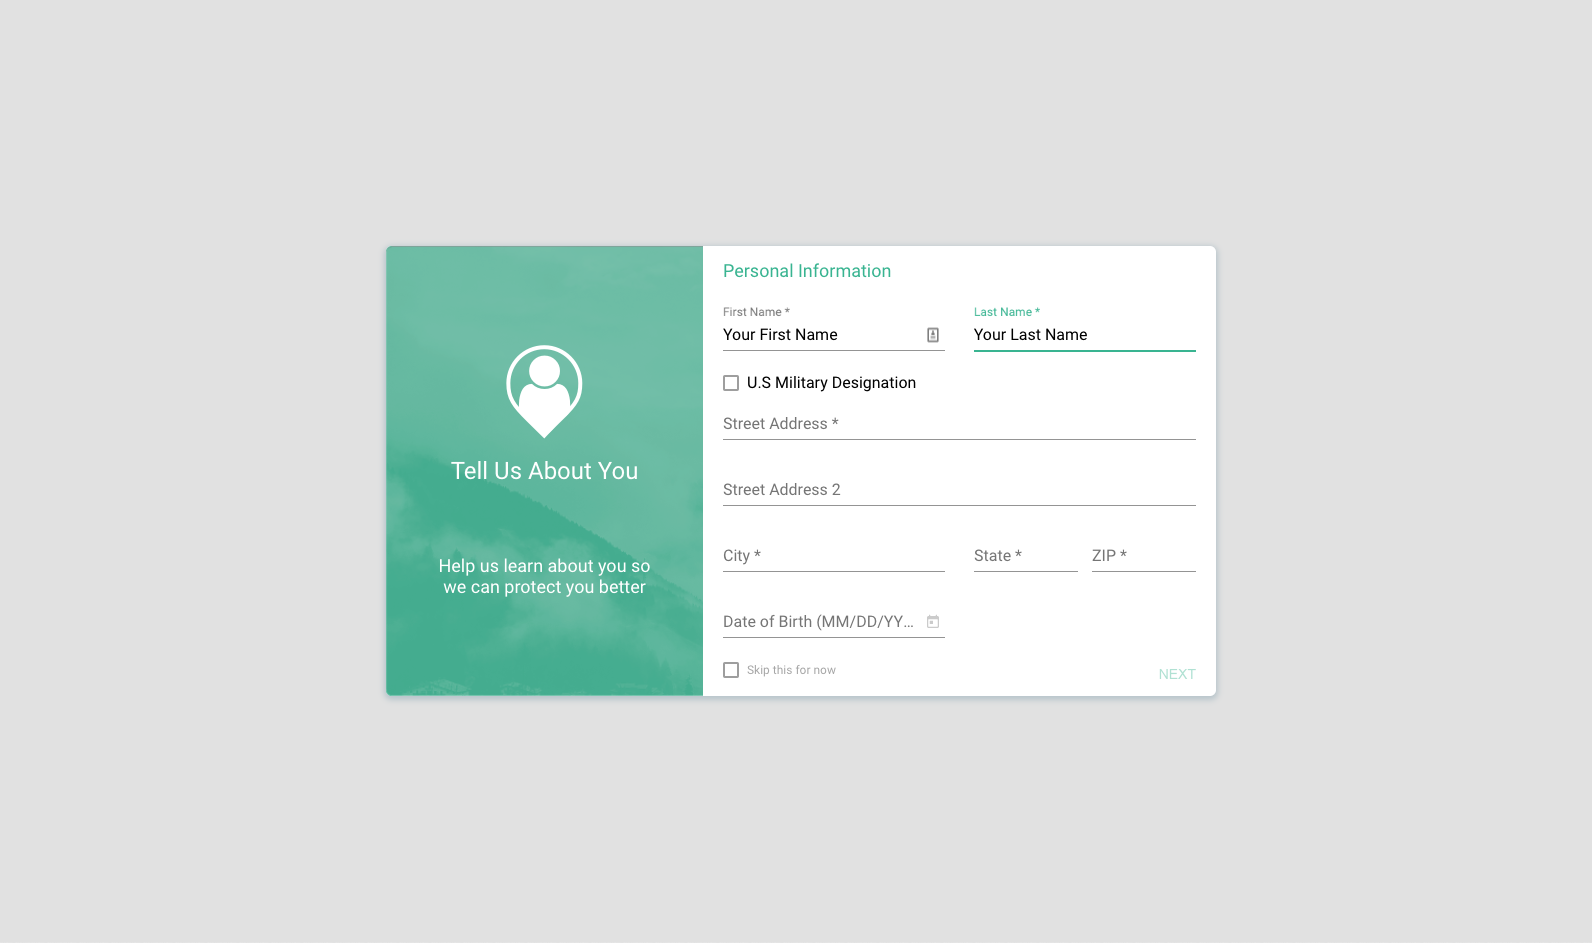
Enter the following information on a series of screens, clicking “NEXT” after each one:
- Name and address. Note: Select your state from the drop-down menu
- Date of birth
- Phone number
- Social security number
4. Next, you will be asked to verify your identity.
You will be prompted to answer security questions to confirm your identity. This is important steps ensures your identity is verified and to protect your account. For each question, choose an answer and click “NEXT.”
Congratulations, your credit monitoring and CyberScan monitoring are now activated!
Now that you’ve completed these steps, your IDX account is working to protect your identity! We will send you an email alert from IDX if your information may be compromised. You will also get a month in review email if no changes have been detected. If you have any questions about how to read a CyberScan alert, our FAQs have a wealth of helpful information.
If you need to update or add personal information at a later date, simply log into your IDX account and click the human-shaped icon in the gray sidebar at the left of the screen. At any time, you can also add information for CyberScan monitoring (any details that are grayed out in your account) by clicking the icon of the fingerprint on the sidebar.